Our first foray into the world of visual art this year will be straight through the looking glass… Self portraits. We will use a variety of techniques to create our own self portraits, and also examine the work of other artists; discussing their processes, stories, and techniques.
During this unit everyone will complete the first self-portrait (as outlined below) and then choose two other styles in which to create two more self-portraits. These ‘other’ two pieces will be accompanied by a short ‘artist’s statement’ explaining your technique and choices. Each student will also investigate the self portraits of three artists (including one of Nora Heysen, Mike Parr or Gordon Bennett) before deciding on one artist to profile. These short profiles will be published on student blogs.
In the meantime, here is one of my favourite Australian self portraits. Nora Heysen painted a number of self portraits in her life time but this one captures my attention most. I think it’s because she looks like she’s deep in thought and barely conscious of the world around her – a feeling I can relate to.

Nora Heysen Self portrait 1938 Queensland Art Gallery Gallery of Modern Art
Here’s a short video interview with Nora Heysen that supports my idea that she was a deep thinker.
Do you already have a favourite self portrait? It might not be painted, but perhaps photographic or sculpted?
Onto the creation of our first self portraits.
To successfully create a human face that looks like a human face it helps to understand that there are some basic ideas to follow. Here are some links to help you get started on that journey:

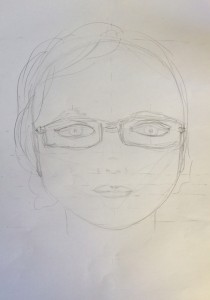
Here you can see my sketch as I did my own research.
Step 1: Use your iPad to take a (sensible) selfie. You will need to be have a clear view of your face.

Step 2: Referring to your research on facial proportions, lightly sketch your face on an A3 piece of paper.
Step 3: Erase most of the lines, leaving only the ‘outline’ of the bigger shapes.

Step 4: Very lightly fill those shapes with words that describe you.
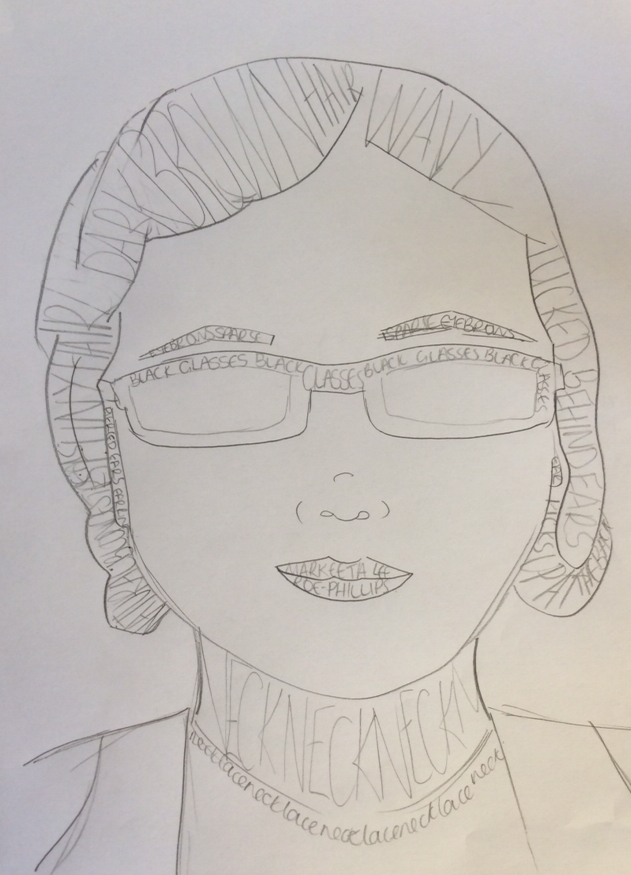
Step 5: Use coloured markers to go over your writing. Do not outline the shapes with the markers.
Step 6: Erase ALL pencil marks.
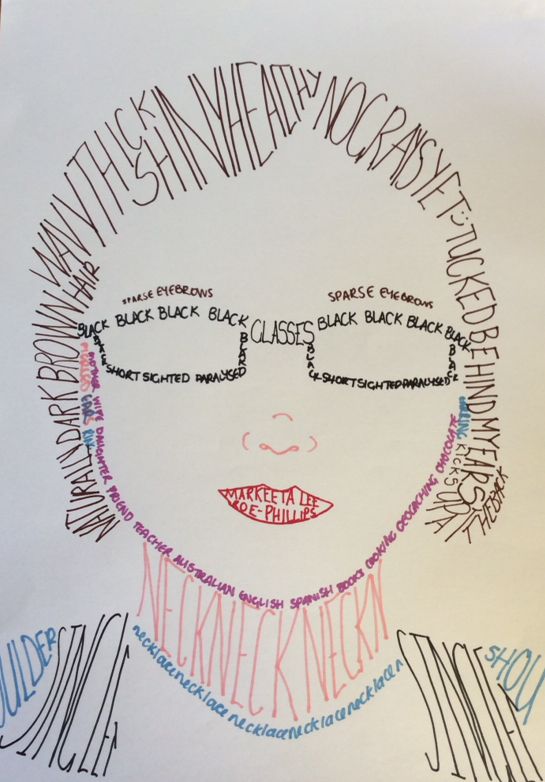
I’m not sure my neck is quite that pink but it’s OK. What would you change? How could I improve?